Creating a private and secluded deck area doesn’t have to be difficult or time-consuming.
We used the Hoft Privacy Kit. It was both quick and easy to construct.
The horizontal planks were a nice touch to the deck’s overall look.
The kit came with everything we needed for assembly except the fence boards, which we had to buy individually, cut and stain before installing.
Despite being a professional deck builder, I appreciated the easy DIYer’s instruction and installation. Construction was straightforward except for two little hang-ups which I will get to so you can avoid the same struggle.
The best part of all was the finished wall looked great but also sheltered the barbeque from the wind and peering eyes.
1. Gather Materials and Tools Needed
I loved the strength, look and ease of maintenance with Aluminium poles. Hoft makes poles exactly for this, with a slot in the middle for holding the 5/4″ decking boards, so that’s what we went with.
Everything had to be purchased individually but worked well with each other.
- 2 Hoft End Post 3″x72″ (Kit #886)
- 1 Hoft line Post for the centre (Kit C6)
- 7 5/4 x 6″ by 12″ Cedar Deck Boards
- 1 Gallon Semi-Transparent Stain
- Head Lock Screws (Or any structural screws with large head)
- Composite Shims will help to plumb up posts
In total, the wall cost 12′ long wall cost just under $800 plus my time.
Additionally, you will need some basic tools to install the posts and fence boards.
- Power drill
- Screwdriver
- Saw
- Level
- Measuring tape
- Stain Brush
- Garbage Can
Once all of the materials and tools had been gathered, it was time to begin constructing the deck privacy screen. The Hoft Privacy Kit came with detailed instructions that were fairly easy to understand and provided step-by-step guidance throughout the installation process.
2. Please measure the length of the deck where you would like the privacy wall to be installed.
The decking is only strong enough to span 6′. If your space is longer than that, you will need to add the required number of line posts to reinforce the wall.
For us, the length was a little less than 11′. With one centre-line post and we were set.
3. Set the two end posts.
Leave at least 2″ between the house and the post.
Set the end post at the edge of the deck far enough to be attached to the deck substructure. For us, that was 1 1/8″ to account for the picture frame overhang decking.
Deck blocks should be installed under the posts so the screws have something strong to anchor to.
Predrill through the decking to prevent splitting and damage.
Check that the post our plumb (straight) with a level. If not, adjusts the screws on the base as needed. Sliding composite (better for a composite deck) shims under the base plate to lean the boards as required.

Adjust if need be, and secure with screws into the deck blocks.
4. Install the centre (line) post
Centre the middle line post with equal space between each end post. For the privacy wall looks symmetrical.
Install in plumb up the same as the end post, with the channels facing the end posts.
5. Slide the rail blocks
Use the Allen key provided to tighten the screw at the base of the post once it is at the correct height.
It is common for decks to have a slight slope, but levelling the first boards will improve the appearance of the privacy wall panel.
This can be done by adjusting the height of the lower rail blocks to account for the slope. This will be the block furthest from the house. Assuming your deck is correctly sloped away from the house.
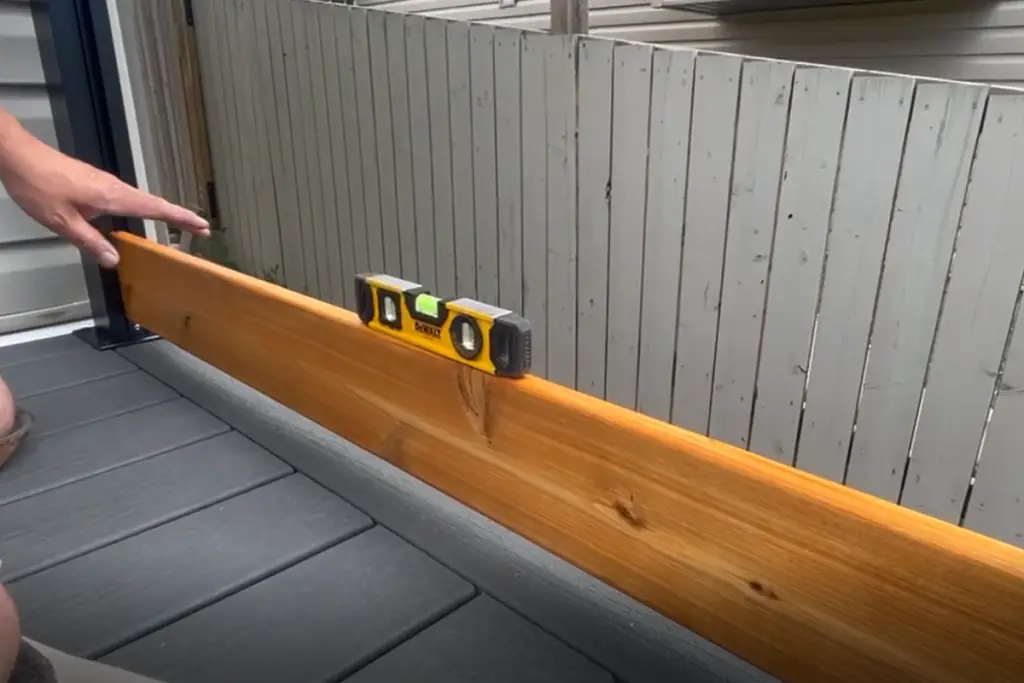
If you’re unsure about your deck’s slope, start by installing the first board. Set a spirit level on top of the board and raise the lower end as required. Measure the new gap height between the decking and the bottom of the board. Remove the board and adjust the rail block height.
6. Install 5/4 Deck Boardscut to length boards.
You can install either 5/4 wood decking or 1″ composite decking for a low-maintenance option.
We went with 5/4 cedar decking to save a little money as well as the look of semi-stain cedar.
Once the posts are installed, cut the decking to fit in the slots. Slight smaller (1/8″) will make application easier.
Before installing the decking, if using wood, stain it off the deck. This will make staining both easier and more consistent and allow you to stain the entire board.
With the slide rails set to the correct height, slide in the first board.
Slide in the “H” clip, which will keep the board in place.

Slide the next board into place. Giving it a slight tap to set the small prong into the wood to hold the board in place and provide the correct gap between boards.
Repeating this process until you reach the correct height.
7. Install the Top Bracket and Post Caps
Once the boards have been installed, attach the top bracket to each post using an Allen key.
With the small screw provided, attach the bracket to the decking edge.

This will provide strength and stability to the fence while giving it a finished look.
Secure the post caps onto each post with the screw on the cap. Facing the screws away from the common viewing area will improve the aesthetics of the privacy wall.
8. Celebrate Your Improved Deck, Shelter from Peering Eyes and Blowing Wind
This is the best part of home improvement.
The joy of completion.
Step back and soak in the beauty of what you have created.
Well done!
Tips and Tricks for Best Results When Constructing a Horizontal Deck Privacy Screen with a Hoft Kit
As easy as this privacy wall is to build. Here are a few tips to make the construction of this fence even better.
Ratchet strap to pull poles together
Despite all you do to level up the posts, it is possible that the space between your post may grow from the bottom to top. After installing the boards but before attaching the top brackets. Loop ratchet straps around the posts and ratchet them together as required. Then screw the brackets into the top board to hold them in place.

Account for height
Wood decking will vary slightly in size. This may not leave sufficient room a the top post for the top bracket.
You have three options.
- Install one less board and have a shorter wall.
- Don’t install the top brackets as the cap will hold the boards in place.
- Remove the fence boards. Rip the required amount off the bottom board where it will be less noticeable, and then reinstall.
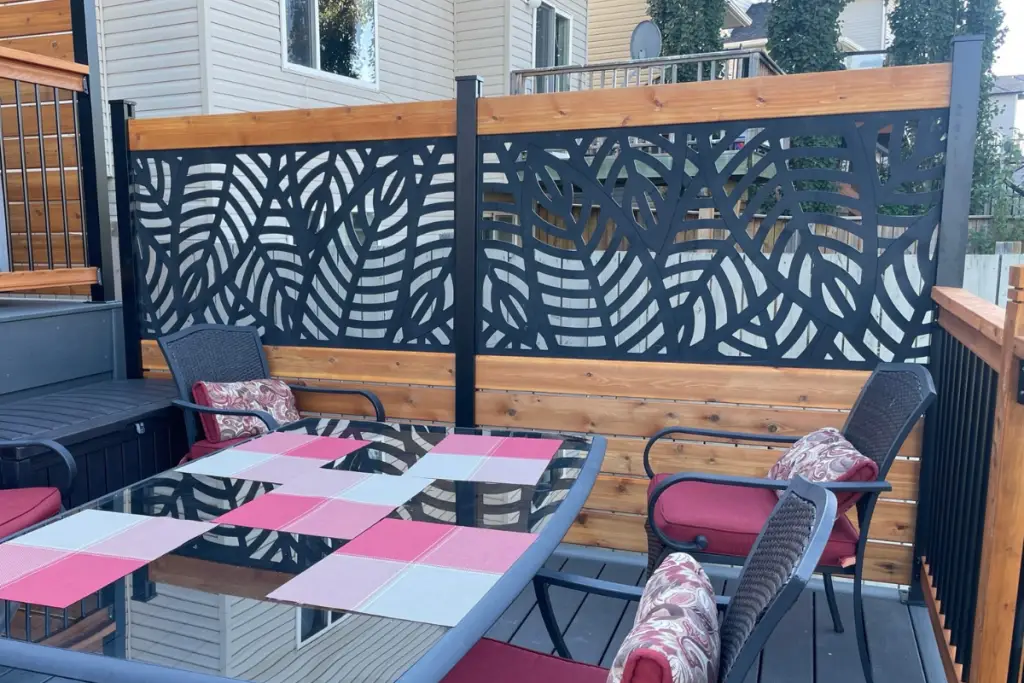
Don’t Limit Your Design
You can improve the appearance of the privacy wall by installing Barret Outdoor Privacy screens. The vinyl can be cut like wood to fit the space. Vinyl doesn’t require maintenance and can add style to the wall.