Sweet, sweet ground level decks. Easy to build, the perfect bridge between your house and yard. Just high enough to raises you out of the dirt but low enough to keep you in your yard. But all this lowness great a challenge. Deck beams low to the ground. Requiring the beam to sit directly on the footing, which isn’t a problem, if you know what you’re doing and how to manage the risks.
Deck beams resting directly on concrete footings need to be anchor with “U” shaped post saddles to the footing to prevent uplift. The footing height needs to be set exactly at the correct height as there is no post to compensate with.
I have built many ground-level decks. Being so low means the beam often rest directly on the concrete footing with no post. This isn’t a problem if the footing is the correct height, your saddles are correctly set, and you beam treated for ground-level contact . Wow, that was a lot of “if,” let’s break it down to keep it simple.
Triple check deck footing height before pouring concrete
Wood posts are easy to cut, making adjusting the distance between the beam and footing easy, but when directly on the footings, you have no such luxury. The footing must be set right at precisely at the right height for the underside of the beam.
The easiest way to do this is to set your deck ledger first. With your deck ledger set, you know exactly the height the beam will be. Regardless, if the beam is dropped or flush. With the deck ledger set either shoot a laser level over to the footing height or a straight board with a spirit level resting on top. Triple check to ensure your footing height is correct. A second to check again is way easier than cutting down concrete later.
Using a sono tube is advantageous as it can easily be adjusted up and down in the hole. Once set at the correct height, push some dirt in tight around the tube, holding it into place. Which is good for forming the concrete above grade, but we will get to that later.
The footing will either be set flush to the underside of the ledger if you are installing a flush beam with hangers. Or the beam dimension below the ledger’s bottom. The easiest way to do this is to cut a small scrap piece off the beam. Then set it on top of the tube just below your level.
Once you have triple checked all the heights, you are ready to pour the concrete.
Protecting the beam on the footing
Ever notice that it’s the ring around the fence post above the concrete that rots out first. Water pools on concrete and rots the wood. The same is true with a deck beam resting directly on the footing. Water will pool and rot the beam on the footing. You need to protect the beam to prevent this.
Keep it separated
The best way to prevent beam rot is by raising the beam off the concrete with deck saddles. Just slightly raising the beam allowing rain to run off and away from the beam. There are several different deck saddle options.
The key is you want a post saddle with the 1″ (25mm) standoff. The standoff can either be a small steel plate that raises the beam or, as with rebar carport saddles, set the saddles in the wet concrete 1″ high. Allowing rain to drain off, away from the beam.
Simpson, one of the leaders in building hardware on their webpage, has a good list with pictures and descriptions of post saddles. Unfortunately, you cannot order from them directly, but it will help when shopping for post saddles. Click here to go to Simpson’s post saddle page.
Post saddles are ideal for holding the deck beams in place and preventing uplift, not as big a problem with such a low deck as a walkout deck but still beneficial.
Lining up post saddles under the deck beam
The post saddles must line up under the deck. If the deck has more than two saddles, install the two opposing side saddles and than run a string line between to line up the ones in the middle. A consistent measurement off the house is not as crucial at this stage as a straight line. Set the side saddles, place the other saddles according to the string.
Post saddle alternative for beams on footings
If you do not want to install saddles to raise the beam of the footing, there is an old school alternative to protect the beam from water. Cut a few asphalt shingles and set them underneath the beam on top of the concrete pier.
The shingle will not hold the beam in place, but it will provide a small level of separation between the wood beam and water on the concrete. If you do not have shingles, you can also use some joist tape under the beam. I have come across this many times when rebuilding old decks. The post bottom, not rotten sitting on a shingle.
Joist tape is excellent that it is a rubber waterproofing membrane with the added advantage of sticking to the wood. Do not wrap the beam as that will seal in the water, but a folded piece under the beam will help to protect the beam from rotting.
Preventing the beam from rotting when low to the ground resting should be a primary concern. The beam rots, the deck is lost it is that simple. I have written more about protecting beams from rot and additional measures to protect not only the beam in contact with the footing but the entire beam. To learn more, click here.
Deck footing height
In Calgary, where I build decks and most jurisdiction concrete deck footings must extent 6″ (150mm) above grade. The height requirement is to keep the beam and post out of water and dirt. Both are a source of wood rot. A deck close to the ground can still maintain 6″ (150mm) of beam clearance by trenching the ground around the pier and beam. It will require a lot of work and removal of dirt by advantageous.
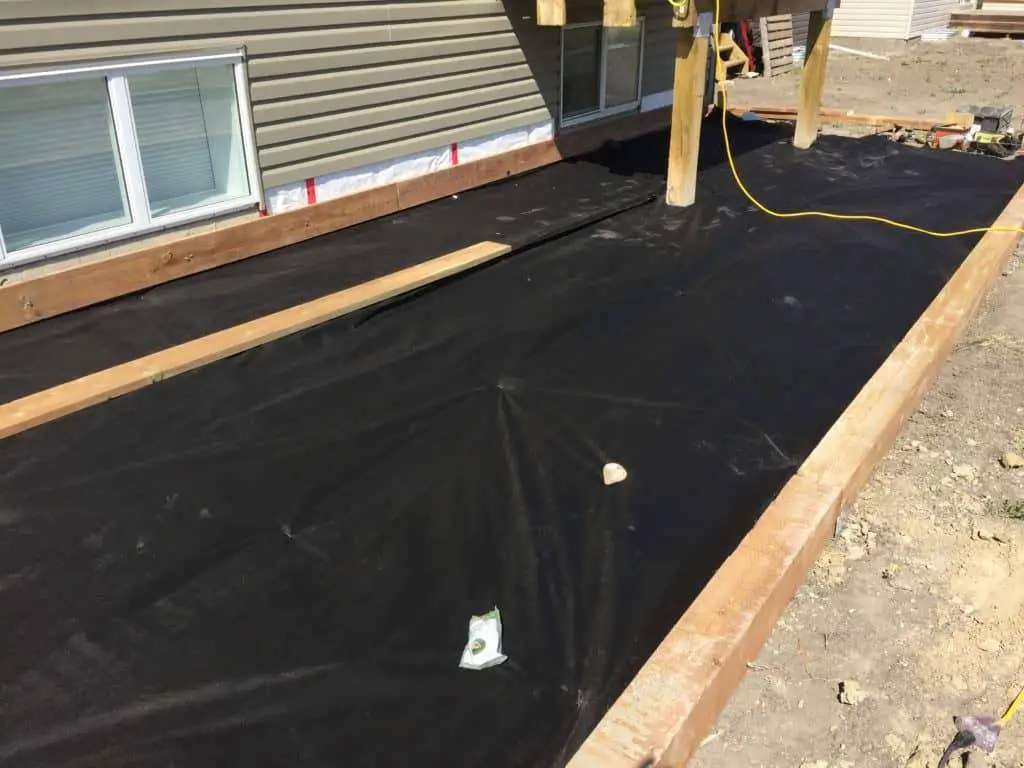
Not a substitute for separation, but installing landscape fabric under the deck and beam will help to limit ground contact between the wood and the dirt. Dirt is terrific but it does contain a high level of rot causing fungi. The fabric helps to prevent the soil from splashing on the wood during a rainstorm protecting your deck.
Extending deck pier to delete post
This is a good idea in that concrete post will outlast a wood post. As always, care must be taken to ensure the concrete footing is at the correct height below the beam. A good idea is to slightly cone the top of the concrete around the saddle aiding in runoff, keeping the beam dry.
Additionally, rebar should be added to the footing vertically. A concrete footing buried in the ground is supported on all sides from lateral pressure. But a footing extending above grade will have additional lateral pressure, the rebar will reinforce the footing. Rebar and concrete are a fantastic team. Each’s strength counters the other’s weakness.
Ops I can’t read a level, what to do if the deck footing is too high
Ouch, like really? You checked it three times, right? Unfortunately, it happens, I must admit I have placed footings to high for beams. Super embarrassing but no the end of the world or even your deck. I minor set back that can be overcome.
Reduce the Beam height
The easiest solution for a high footing is reduce the height of the beam. Both the International Residential Code and the Canadian Wood Council allow for beams to be reduced in height by adding additional beam ply. A 3 ply 2×8 beam can be substituted for a 2×10 2 ply beam. Simply whatever the wood size one down can be used by adding an extra ply. This can be done for 2×8, 2×10 and 2×12 beams. Add the extra ply and reduce the height of the beam by two inches (50mm).
Chances are that the footing is not exactly 2″ (50mm) to high and will require a lengthwise cut shim under the beam, setting it at the correct height on the footing. Yes, the shim needs to be cut lengthwise, with the grains to prevent the shim from crumbling under the beam. A board less than 2″ (50mm) crosscut is very brittle and won’t support the weight of the beam.
Notching the bottom of the beam over the footing
As a last resort, you can notch the beam for the correct height. The end of a beam can be notched up to 1/3 of the height of the beam. A 2×8 beam, true height 7 ¼” (184mm), can be notched 2 3/8″ (60mm) off the beam over the footing. Reducing the height of the beam accordingly.
As whenever you cut treated lumber, make sure to end treat the notched area. Critically important, as the notched wood will be sitting close to the concrete and water. Protect it, for it will last.
Notching the beam is the best solution if only one of the deck footings is two high. Requiring less work and material than shimming up the rest of the footings and nailing the additional beam ply.
Summary of a deck beam directly on footings
With a low ground level deck, this is mostly a requirement as there is no room for a post. But as I wrote this, I started thinking that even if not required raising the footing height to the underside of the beam could be advantageous. Deleting post and making the deck that much stronger. The beam secured in a post saddles raised up out of the water 1″ (25mm) by the standoff. Beams directly on the concrete footing is a great idea. I am going to start doing this more.