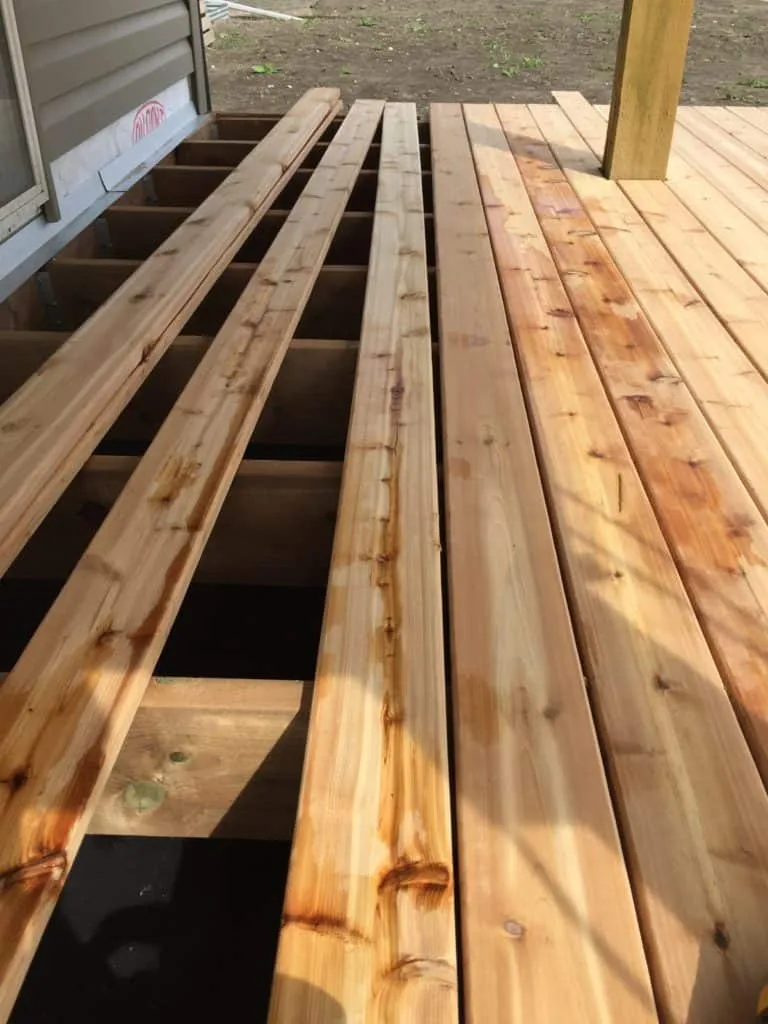
5/4″ decking was an innovative idea to reduce decking costs while improving appearances of wood decking. And caught on it has, now the majority of wood decking I install is 5/4″. I am not alone, as now most new wood decks are 5/4″. But the spacing of 5/4″ decking is a little different than traditional decking.
5/4″ decking needs to be spaced according to the type of wood being installed. For 5/4 pressure treated decking, it should be installed tight and allowed to shrink to provide water drainage. With cedar 5/4 decking installation should be with 1/16″-1/8″ gap (2-3mm), which will expand to 1/8-1/4″ (3-6mm) once the wood has dried.
The reason for the difference spacing installation for the decking is due to shrinkage. Not all wood shrinks the same amount. Spruce/Pine/Fir (SPF) has a much higher shrinking rate than Western Red Cedar.
Cedar Shrinkage: Tangential: 5.0%
Wood Datebase
White Spruce Shrinkage: Tangential: 8.2%
Wood Datebase
Translation 5 ½” (138mm) treated decking will shrink about 7/16″ (11mm) but cedar only 9/32″ (7mm). So after a season of drying, both will have roughly the same spacing ¼” (6mm). Providing both deckings’ plenty of spacing for drainage.
The point of gapping decking is drainage. It is not good for the decking to pool water, which will increase rot and make your deck unsafe. Gapping between the decking allows for excess rain to drain off the deck. Keeping the decking dry and looking good.
If the decking is not spaced like vinyl sheet decking, it requires the deck to be sloped 1/8-1/4″ (3-6mm) instead of gapping to provide runoff. But with decking boards, spacing is preferable as it allows for drainage without the slope. Along with the fact that decking boards will naturally shrink after installation, creating a gap between the boards. Plan for it, and it will look and work beautifully.
Step by Step decking spacing installation
Using a perpendicular decking design as it’s the simplest to do and understand. Which will help in understanding the decking process, and then it can be applied to other situations.
All softwood decking will shrink. Therefore it is best to install decking boards tighter than your final design to account for shrinkage. With SPF treated decking, tight is best. With cedar with its lower shrinkage rate, a small 1/16″-1/8″ gap (2-3mm) works better.
Build a spacer, to consistently space cedar decking
You can go online and order a fancy deck spacer, but the cheapest way is to drive a 1″ (25mm) flute finishing nail through a scrap piece of plywood. Make a few to allow you to space the full length of the board. The board needs to be 3-4″ (75-100mm) long. Long enough to easily grab but short enough as not to overhang the decking board .
.
Again, with pressure treated decking, no spacer is required as it will shrink enough for drainage without spacing initial.
Installing the first decking board, starting spacing right
Snap a chalk line 1 ½” (38mm) less than the depth of the decking. With a 5 ½” (138mm) decking board, this will be 4″ (100mm) off the front of the deck. Once installed, the decking will overhang the rim a 1 ½” (38mm). The overhang helps to protect the rim joist from water and rot while providing room for facia cover or skirting. Even without facia cover, the overhang looks great on the deck but still on the joist enough for support and strength.
Pick a straight decking board and screw along the chalk line. Adjusting the board if required to line up with the line. It is important that the decking is perfectly straight for this board will set the tone for the entire deck. If installed straight, the remaining decking will be. If crooked, you don’t have a hope.
Once the first board is installed perfectly straight to the chalk line, load the deck up loosely with the rest of the decking. Laying it out for you can easily reach to install but loose enough to allow correction lines and adjustments of the decking as you are installing.
We will get to correction lines in a minute, but the direction of the decking must be addressed first. Which side is up on wood decking?
Wood decking must be installed bark side down
This debate has been one of my most frustrating parts of researching about decks online. There is so much misinformation out there. Yes, I said misinformation. It’s not that there are multiple ways to install decking. There is a right way and a misinformed way. To all those who say bark side up! Learn about wood! Learn your trees! Learn water. For Pete’s sake, just learn before you comment.
“A happy deck is a smiling deck.”
SAIT Shop Teacher Dan
If installed wrong side up decking will cup. Pooling water causing the decking to rot. Decking installed with the core of the tree, the smaller cells at the top. The bark side down towards the joist, the long cells. As it dries, the longer cells will shrink more, pulling the edges of the deck down and the water off the decking.
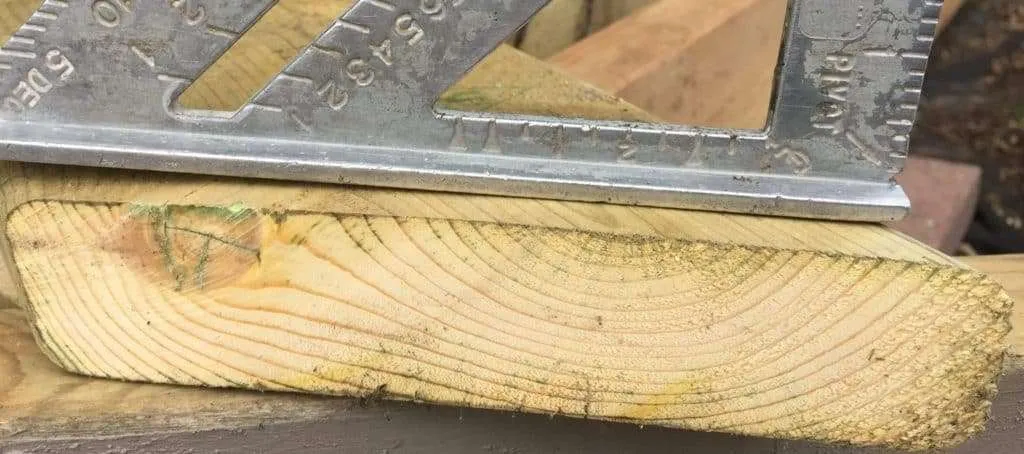
When installed bark side up, the boards will cup, pool water and rot. Its that simple. If you want a more thorough explanation, War Line Painting has a great article explaining why decking should be installed bark side down. Click here to read War Line Painting decking article. The sad thing is this is a painting company, and they know better how to install decking then some decking companies online.
Yes, a lot of 5/4 decking boards are cut through the heart of the tree. So on one end of the decking, the rings may be smiling, but the other end is frowning. I get it, but you need to try at least. The good news is with edge screwing or face screwing. They will often hold the decking down, preventing cupping even when the decking is installed upside down.
Okay, enough about the right side of decking. Breath in, breath out. I am fine.
Correction lines correcting board spacing every half a dozen boards or so
Now that you are set up pull the next board tight. Spaced if Cedar and screw it down and repeat six more times or so. Then it’s a good idea to snap a correction chalk line. Surprise! Not all decking boards are the same width. There is going to be so growth after a few boards. The correction line will straighten out the board and return it to a consistent distance from the front of the deck.
Measure from the from on the deck on both sides to the last installed decking board. Whichever side is bigger, add the width of the decking and mark on the joist. Snap the line across the deck. Install the next decking board straight to the line. You will not have a consistent space between the two boards. The last board and the corrected board will vary in spacing to correct the boards but will give you a straight line to work off again.
If you do this every six boards or so, the gaps will be more consistent then waiting till then end. A simple story of multiplication. Six boards gapped large will grow less than 30 boards. Small adjustments will blend into the design. A large wedged decking board at the wall is ugly, and small adjustments can avoid that.
Small side note. The prairie provinces of Canada were all surveyed into one-mile parcel sections. Many country roads follow these lines. But if you are out driving those back-gravel roads. If you drive long enough, you will come across a “correction line.” Even the government of Canada needed to correct their course every few. To start back with a correct, true line, removing all the errors. Good idea for surveying Canada, good for building a deck.
For treated decking, which can be installed without a gap, another option is to fill the entire deck behind the installed decking. You will have some crowned decking boards creating uneven gaps. The fix this, leave a gap between the sixth and seven decking board from the house. Cut some large wedges out of scrap 2×4’s and pound them in between the two decking boards. Do this every few joists spacing till all the decking is tight. Then screw down all the decking between the first one and the wedges. Then remove the wedges, and you can finish up the last few deck boards.
Spacing the last six deck boards
When you get to the last six deck boards, you want to measure and make a little adjustment to prevent having a sliver of decking beside the house. Ideally, the last board should be half or more. Giving you enough material to screw down to the joist. Layout as many full decking boards as can fit in the space. Then measure the remaining difference between the last decking board and the house if it’s less then a quarter of a board, 1 1/2″ for 5 ½” decking. Increase the last six boards spacing to for it doesn’t need a sliver of decking along with the house. If its close to half, 2 ¾” for 5 ½” decking, install the deck tights as not to shrink the last piece to less than half a board.
Before screwing down the last six deck boards, ripped down the last decking board. Pull out the second last decking board, slip the cut decking under the siding flashing and reinstall the full decking piece. Then finish screwing the decking down.
A few extra decking tips
Hopefully, all your questions are answered about deck spacing. I have included a few extra decking tips to help you build a better deck.
What to do if the deck is wider than the longest deck board
It’s not unusual for a deck to be winder than 16′ (4.8m), but most deck boards’ longest length is 16′ (4.8m). You have three solutions. Two are practical. For a deck wider than the longest decking board, you can either butt joint, insert or run the boards at a diagonal.
Running decking diagonal has a nice look but requires reduced joist spacing, along with additional labour in angle cutting and installation. For that reason, I would only recommend diagonal decking for experienced deck builders. It’s not rocket science, but there are many angles to remember. Like the “angle” joke?
Commonly wider decks incorporate butt joints on the decking, which is a little more complicated than it sounds. First, you must make sure all deck boards butt ends are cut true. Often from the mill, they are not perfect.
Two, you need to add an additional joist or block where the joints are to ensure that the decking has a full joist width to land on. This will either involve lots of scrap blocks being attached to the joist at every joint. Or intentionally doubling up joist wherever butt joints are. Taking some pre-thought for butt locations. It is recommended that you do not create a line down the whole deck of butt joints butt stagger them for appearance and strength.
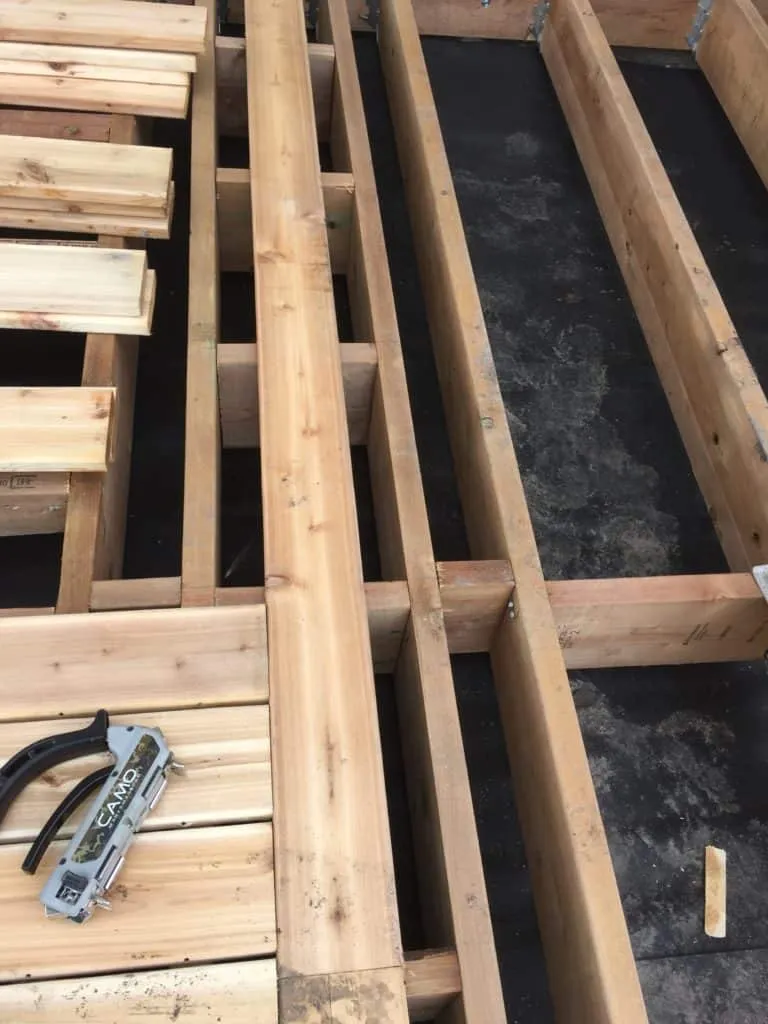
All the work required to do butt joints right, I suggest a third way, inserts. Plan for it and split the deck in half. Adjust the joist in the centre, spaced the width of the decking plus 3″ (76mm). Standard decking this would be 8 ½” (216mm) and install blocking ever 16″ (400mm) in between for the insert decking board. Then rather than have a butt joint in the decking, you have an insert board that adds intrigue to the decking appearance. It is stronger and less likely to trap moisture and rot the ends.
Don’t pre-cut your decking to length
Install the decking on the deck overhanging the edge. Then snap a chalk line and cut them all together in place. This will give you a straighter line and take less time. Its good practise to overhang the decking 1 ½” (38mm) matching the overhang of the front decking boards installed first.
I discuss deck overhang in much more detail in another article. If you wish to understand decking overhang better, click here to read more.
Decking spacing for picture framing design
Picture framing is a nice way to finish off a deck hiding all the end cuts. Two tips for picture framing. First, install all your decking and then trim back for the picture frame board. Some guys like to install the picture frame first. But then you will need to cut each board individually and insert it in. Gang cutting in place will provide a cleaner line and save time.
Secondly, wood shrinks less longitudinal then tangential. Translation, the width of the decking will shrink more than the length of the decking. If you install the picture frame decking tight to the butt ends decking, it will only have the gap as the other decking gaps after drying. For most, this won’t matter. Even width your other decking boards, there is variation in spacing. But if you want perfection, you will need to gap the picture board half of the desired decking spacing. So, once the decking dries, it will be consistent.

Spacing for Edge Screwing of decking
The most common way of fastening 5/4″ decking is faced screwing with #8, 3″ deck screws. But there are many advantages with edge screwing. Camo is excellent for edge screwing and has a built-in deck spacer, which is handy in creating consistent spacing. For pressure treated decking, use the smallest gapping 1/16″ and let it grow to size when the decking dries. You will have a slightly larger space then if the boards are installed tight, but it’s more efficient then using the no gap attachment. An additional 1/16″ (2mm) gap won’t even be noticeable while using your deck.
Conclusion of 5/4 decking spacing
All decking needs to be spaced to allow for drainage. Ideally, the finish gap between deck boards will be between 1/8″ (3mm) and 5/16″ (8mm) but should not be installed at this spacing as 5/4 boards will shrink, increasing the gap. 5/4 cedar should be installed with a small gap and pressure-treated tight. By next spring, when the decking is dried, it will be correctly spaced.