Not a step-by-step guide on how to stain your deck but tips for making staining your deck a better experience. Often with projects like staining a deck, the little things make the difference between a quality-stained deck that you enjoyed doing. And a miserable experience with results that you cringe at every time you look at.
This is a list of tips to make staining your deck a more enjoyable experience. While improving the end product, a good-looking deck protected against the elements that you can enjoy for years to come.
Many of these tips I have learned the hard way.
Doing the wrong thing and then wishing I had done it the other way. That I had known these tips first. Before damaging the deck or spending many painful hours staining the wrong way.
When I was a kid, I use to read Berenstain Bears. They often had a “moral” which the overly eager Papa Bear taught. Often by demonstrated to the kids what to do by doing the opposite. Then with a bump on his head, you would see the kids quickly doing it the “right” way.
LOL. It just occurred to me that STAIN is in their name. But back to my story.
I relate with Papa bear. Almost every one of these tips I have learned by doing it the wrong way. But now you can learn from my mistakes, for you don’t have to have the same painful experience.
“Experience is the best teacher. But it doesn’t have to be your own.”
Reuben Quail
Now for the tips on staining your deck.
The biggest bonus of these tips is all the money you will save, not having to hire someone to do the work who knows these tips. And the pride of doing it right yourself.
Let’s start with personal protection.
“Safety First”
1. Knee pads
You are going to spend many hours on your knees sanding and staining the deck railing.
When you first start, you will be like,
“I am good. My knees are fine.”
But after spending half a day or more on your knees, you will wish you had worn knee pads.
Avoid regret. Start with knee pads.
2. Wear Gloves
What can I say? Stain, stains.
Wearing gloves will make clean up so much easier.
Gloves can easily be taken off after, revealing your stain-free hands. Instead of scrubbing the life out of your hands later trying to get the stain off.
3. Be careful with pressure washing can damage the decking
Going closer may feel like you’re making more progress. Stripping off that old paint quicker, or that stubborn old paint.
But there is a reason to keep the wand 12″ (300mm) from the decking. Holding the wand closer will tear the fibres of the wood. Creating a rough surface. The fibres sticking up like Velcro. Not a good look or feel on your deck.
Meaning more sanding to smooth out the decking again.
Better to use the pressure washer to remove the dirt, the sander to remove the paint.
It may feel that you will save time stripping with the pressure washer, but it will take longer to sand out the destroyed wood fibres than to sand off the old paint.
4. Protect the area around deck from debris from washing the deck
If the paint is flaking off the deck. Power washing it off the deck will clean the deck up, but all those paint chips will cover your grass, your flowers, your fence. Anywhere the water sprayers.
It may seem like nothing is happening on the deck, but when you look away from the decking, a disaster will surround you.
Better to lay down tarps before spraying to catch all those paint chips. They are nasty to clean off later.
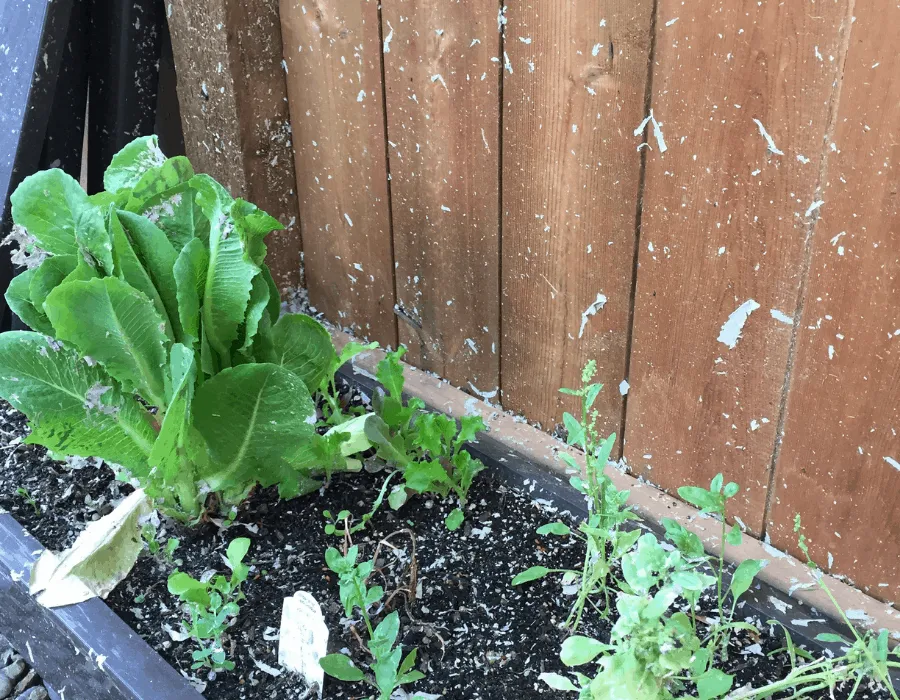
Any edible potting plants need to be move 10′ (3m) away from the deck and the spray. Preventing your leafy garden from becoming a paint chip salad.
That 600 psi can really throw things.
5. Use a cleaner
Stain will stain whatever it is applied to.
If your deck is dirty, even just a thin film of dirt, the stain will not fully adhere to the decking.
Rather the stain will stain the “grime,” which will be washed when you clean the deck. For best results. Longest lasting you want nothing to stand between the stain and the decking. Use a good Wood Stain & Finish Stripper to get all that grime and old stain off.
Best done with a paint tray and good deck scrub brushes. With firm bristles to work of the dirt and grime. Most will require a little active time on the decking. Mop in on the decking. Give it a few minutes, as many as 15. Keeping it wet. Then a good level of elbow grease firmly working it into the decking. Stripping off the old stain or paint.
Remember.
“Success is in the Prep.”
Take your time to get all the dirt of old stain off. It may feel like you’re not making progress. But two steps back is a giant leap forward.
Getting the deck clean is worth more than the quality of the stain. You can buy the best deck stain in the world, but it will not last if applied to a dirty deck.
Focus on the clean.
Clean decking will soak up the stain better. Lasting for years to come.
6. Neutralize the decking after cleaning.
That wonderful cleaner that lifted off the dirt and grime will now need to be clean off.
Sounds crazy, to clean off the cleaner, but it is essential.
Not a chemist, but something to do with PH balance or something. The chemicals that help to “unstick” the dirt will also “unstick” the new stain.
Rinsing the deck with Brightener will return the wood to its natural state. Ready to soak up the new stain.
7. Give time for the deck to dry before staining
After all this spraying and cleaning, your deck is going to be wet.
Give it time to dry out before staining. Wood is like a sponge. The dryer it is, the more it will absorb. The deeper the stain is pulled into the decking, the longer it will last.
So, after washing your deck, give it a good 48 hours of drying before staining.
8. Sufficiently sand before staining
Closely tied to point #3 about prep, but before a drop of stain is applied, make sure all rough spots are sanded out. There is no skip this step. No amount of stain will smooth out the rough spots.
Take your time to make sure every deck board is properly sanded, barefoot ready.
An extra tip here.
Don’t go too fine with the sandpaper. Anything finer than 60 grit will only produce a fine powder sealing of the decking to the stain.
9. Vacuum after sanding
Speaking of fine powder, after sanding but before stain, vacuum off the decking. Removing whatever dust is on the decking, leaving nothing but decking. Ensuring that the actual decking is stained, not just the sawdust.
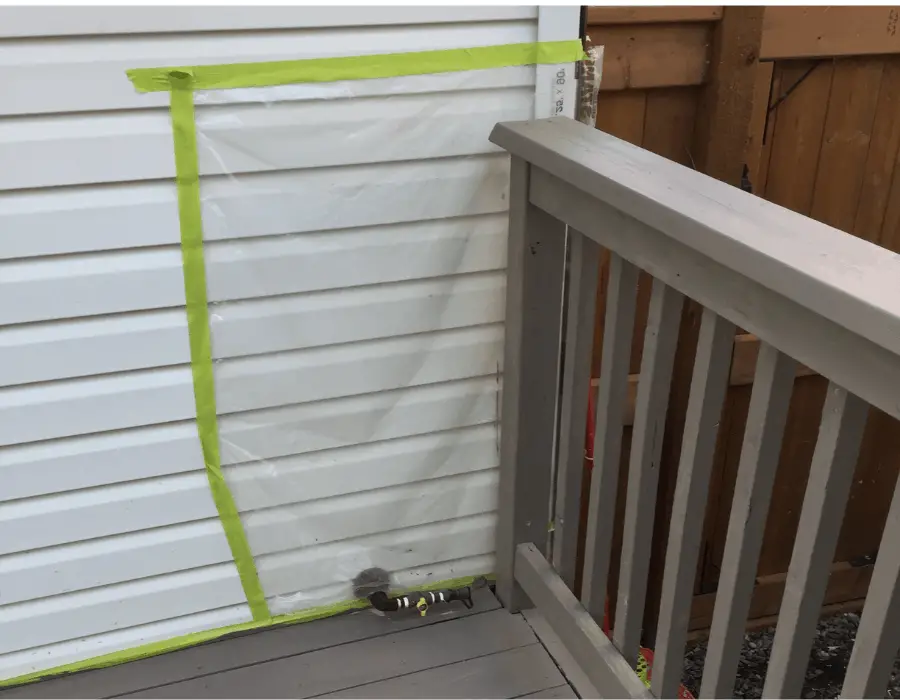
10. Protect your house from stain
You are getting close now but still more prep. It is easier and will take less time to protect your house from stains than scrubbing it off later.
Run a 1 ½” (38mm) painter’s tape on your house wall, just above the decking. To prevent staining the wall while staining the deck.
With railing close to the house tape poly (plastic) on the wall. Preventing overspray from getting on the wall. Critical even when not using a sprayer. A stain brush will flick stain.
The protective plastic should cover the wall at least 1′ (300mm) past the railing on all sides and above. Bigger when spraying.
Years ago, we were spraying a deck. Then the next day, the neighbour complained that his chain-link fence, 6′ (1.8m) away from the deck, was stained. And he was right. The wind had carried the stain all that way unto his fence. Yes, protection would have saved time compared to trying to clean his fence.
Protect everything you don’t want stained. No exceptions.
11. Tape off the door to prevent footprints
After protecting everything around your deck, you need to protect your deck.
Feeling at home, at our homes between coats, one can easily forget that the deck is freshly stained and walk out on it with your morning coffee.
Leaving footprints on your newly stained deck.
Prevent this with some painter’s tape across the doorway. Just a quick reminder as you open the door that work is in progress.
We are almost to the fun part of staining your deck. The deck is cleaned. Sanded and protected, Ready for stain.
Start with the railing.
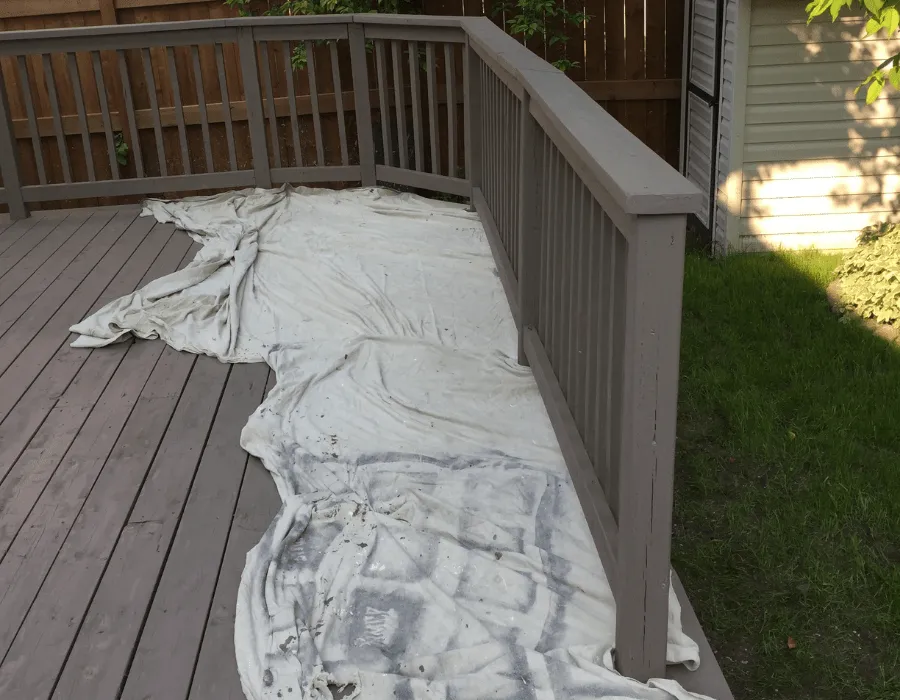
12. Use drop cloths under railing while staining
Ops, one more prep and protect step still.
Put drop cloths under the railing before staining them. The thousands of brush strokes will have drips. Drips that will leave dark spots on the decking if not collected.
Spreading drop clothes under the railing will allow you to focus on the railing without worrying about dripping stain.
If you don’t have drop clothes. Dig into your recycling for some cardboard. Break open the boxes and lay them under the railing where you are working.
13. Include railing in stain volume calculation
Make sure you include the railing when estimating how much stain you will need.
Staining railing will eat up both your time and railing. Which is the number one reason I recommend aluminum railing , even on wood decks.
Figuring out how much stain is needed is a little tricky.
You are not only staining one side but four.
The front, sides and back, all need to be stained.
An 8′ (2.4m) section of railing is just over 50 square feet (4.6 m2) of surface area. Two coats, which is better than one, means roughly a quart (litre) for every section.
A 16′ x 8′ (4.8 x 2.4m) deck with railing all on three sides, 4 sections. Will need roughly a gallon (3.78L) of stain.
You can get more exact in calculating area, minus the gaps and times by the precise height of the railing, but a can for 4 sections is pretty close. If nothing else. Do one coat and then adjust the number for the second coat.
14. Load the face of the baluster and clean up the edges
For 2×2 palings on wood decks. Don’t worry so much about staining the edges but brushing out the stain to prevent runs.
Do this by loading (dip the brush in the stain and then brushing) the face of the baluster and then brush out the edges without adding staining. This will speed up staining while minimizing runs.
Don’t worry about not having sufficient stain on the edges. If you do the same process on both the deck and yard side, you will get plenty of coverage in the end.
15. Use a pelican for the stain brush for the railing
Having a handy handle to hold your stain and brush in makes the Pelican a good investment. An open hand is less strained than clutching on a can.
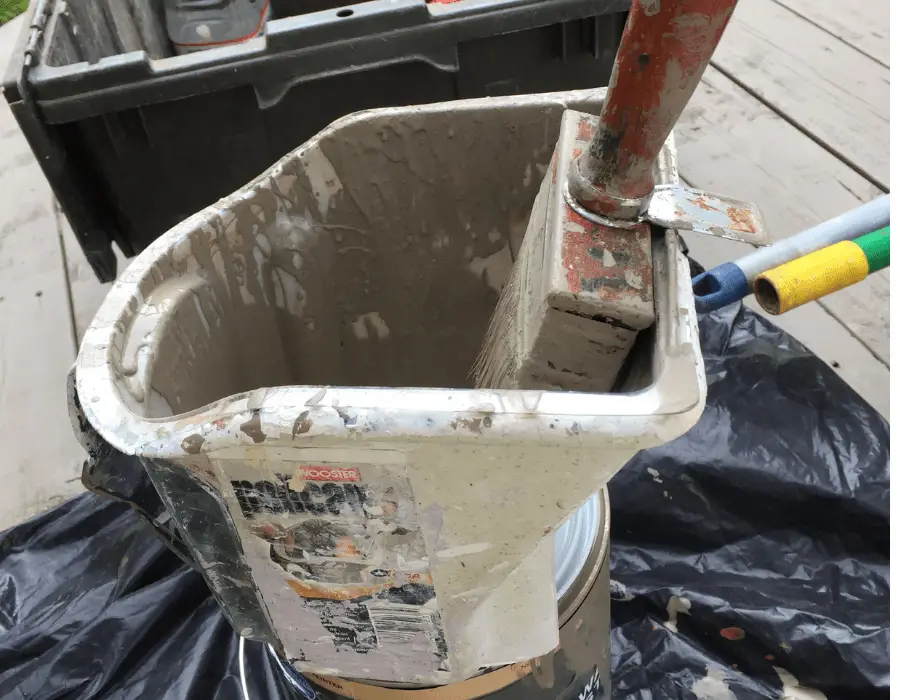
Unfortunately, the magnet will not hold a large 4″ (100mm) stain brush.
No worries, that little metal hook on the brush can be swivelled out whenever you need a break from holding the brush. Hooking on the edge of the rim. Preventing your brush from being soaked in the stain. Dripping all over the next time you use it.
Once your done the railing. Wrap up the drop clothes and your are ready for the good part.
But give your back and knees a break.
16. Use Poles for brushes and applicator
Just like knees pads, poles may seem unnecessary, but they will make staining much more enjoyable. And less painful. Just saying.
Most quality stain brushes handles can be screwed out and replaced with a broom pole.
You can buy a specific “painter’s pole,” but stealing the one from your broom closet will work just as good.
You will need to exchange the Pelican for a paint tray for the stain. Especially if using a pad applicator. Which is my next tip.
17. Use a quality applicator for the deck boards
Stain brushes are great for working in the stain and doing the edges, but a pad applicator is easier to blend in the stain. Minimizing pooling and over staining when you are working off the wet edge.
You are working off the wet edge, right?
Similar to the advantages of a roller for painting walls. A pad applicator speeds up application while making it easier to blend in the stain.
Bonus Tip# Standard paint tray is less than 10″ wide. Need to use a smaller pad applicator to fit.
I do recommend using both a brush and pad applicator.
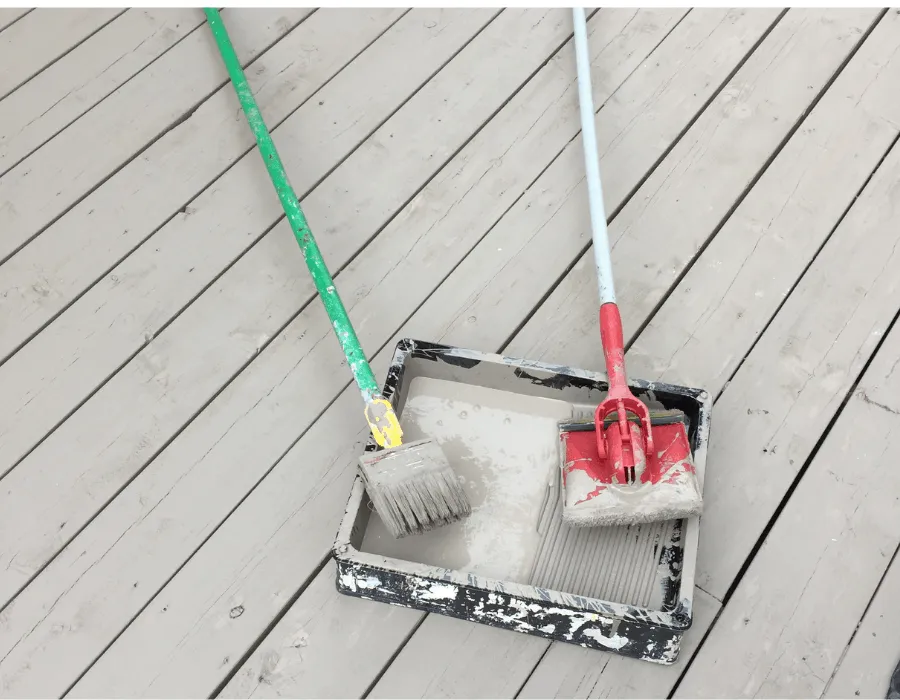
The brush for the edges along the house, around post and between deck boards.
The pad for the main deck boards.
Shur-Line sells an applicator with a groove tool. The handle angles one direction, gives you a flat pad, the other direction an applicator for between deck boards.
But I have not found this very helpful. Often not fitting between boards or ripping apart before the deck is done.
Evens HomeRights applicator with gap wheel doesn’t solve the problem.
A brush and pad with a pole is a better combination.
18. Uses bags to store your brushes between staining
With two coat application which is my next tip, you will need to do something with the pad and stain between uses. You could wash them all out but sticking them in a sealed bag will prevent them from drying out but save time cleaning them.
You could use a large zip lock bag, but my cheap personal favourite is simply sticking them in a bread bag. Tie the end. Off course emptying out the bread and crumbs first. It does the trick just as good.
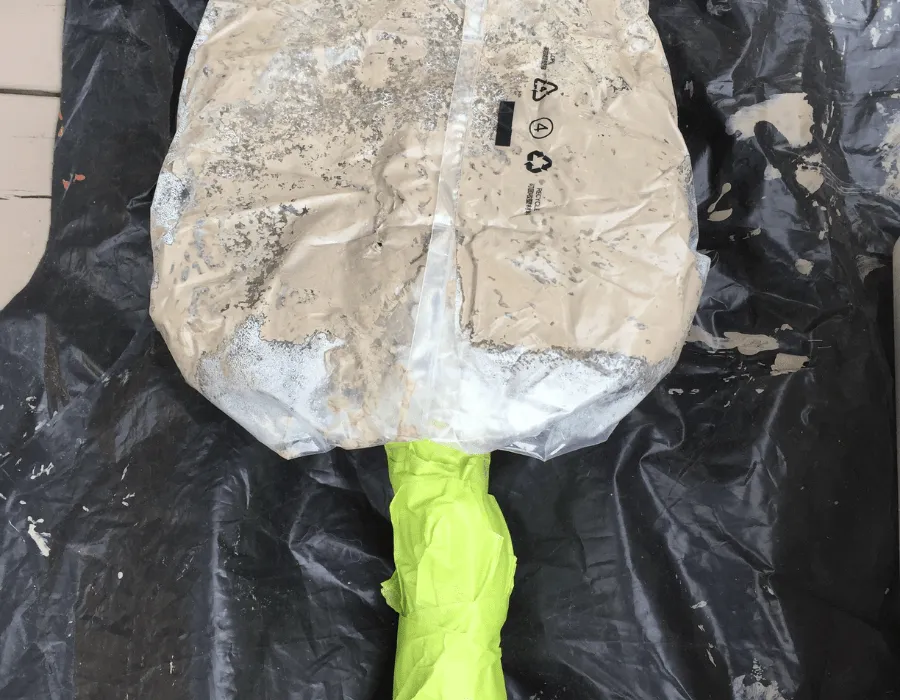
When you are ready to get start again, pull them out of the bag, and they are ready to go.
Saving cleaning till you are all done.
19. 2 thin coats are three times better than 1 thick coat
With few exceptions like Cetol one coat exterior stain 2 coats are better than one.
Trying to apply a “thicker” layer of stain will only make a mess, not better coverage. Two thin layers of stain will soak into the wood better and blend better.
Save time do two coats, not one.
20. Solid stains are easier to blend
I love the look of wood. With its beautiful grain patterns but if you are not confident staining using a solid stain colour is easier to blend. A solid colour that covers the wood will not darken with additional stain like semi transparent. Even if you get a little thick in some spots.
Solid stain is easier.
As a bonus, solid stains last longer. Behr solid stain is warrantied for 10 years as opposed to their semi-transparent, which is only 6.
But no take-backs. It is a lot of work to strip of solid stain to restore the deck to use a semi-transparent or clear coat. Make sure you are good with a solid deck colour before going that direction.
I hope these deck staining tips will save you from frustration and make staining your deck staining a good and enjoyable experience.
You might even enjoy it so much you will volunteer to stain your neighbour’s deck. But be ready for the weird look when you knock on their door and ask if you can stain their deck.