The finish of composite decking is amazing, from imitating natural wood decking to an entirely different look. But the ends. The cut ends of composite decking are less than beautiful, requiring a finishing detail.
There are many ways to finish composite decking ends. Each with its strengths and weaknesses.
Composite decking ends can be finished by picture framing, raised fascia board, painting the ends, attaching decking veneer, composite nosing strips, vinyl stair nosing cove, composite corner trim or plastic end caps. In short composite decking, ends must be hidden or blended into the look of the decking boards.
Lots of ways, but which one is right for your deck? Let me give a short description of each to help you better understand your options to finish a composite deck.
- Picture Frame
The says it all. Install the main decking boards, then finish the ends off with a decking board running perpendicular to the decking. When you are in the yard, look back on the deck, the cut ends are all hidden behind the decking board.

2. Raised composite fascia board
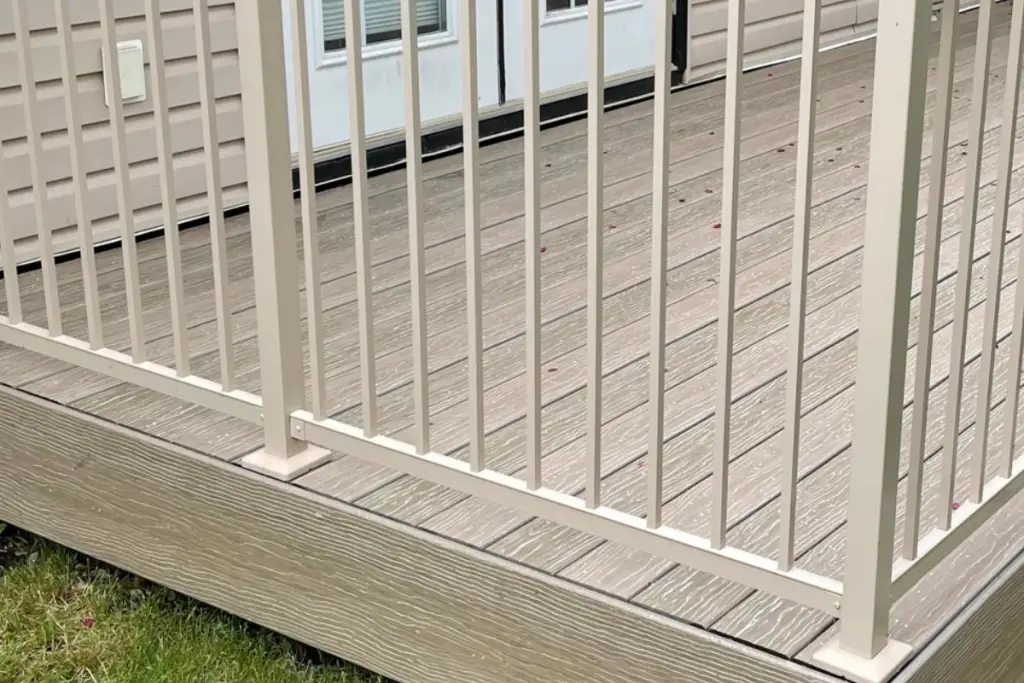
A straightforward way to cover the end of the composite decking boards. Install the decking on the deck, cut flush with the edge joist. Install the composite fascia board flush with the top of the decking
The fascia extending higher than the joist by the thickness of the decking. The decking ends hidden behind the fascia board. With nothing but the beautiful fascia board to see from the yard.
3. Paint the Composite Decking Ends
The problem with composite decking ends is they are a different colour than the decking. The composite is wrapped with its beautiful colour that you love, but the ends are the colour of whatever ground-up milk cartons, plastic bags and sawdust are. Which can vary from board to board. The solution, colour match the polymer cap and paint all the ends to match the decking colour. Making the composite decking ends consistent with the deck.
4. Glued on veneer cap
Similar to painting, the decking boards ends but taking it to a whole new level. Attach a thin veneer from the decking to the cut end. Not only is the decking the same colour as the top of the decking but with the same texture and colour pattern.
Here is a short video of Dr. Decks doing precisely that.
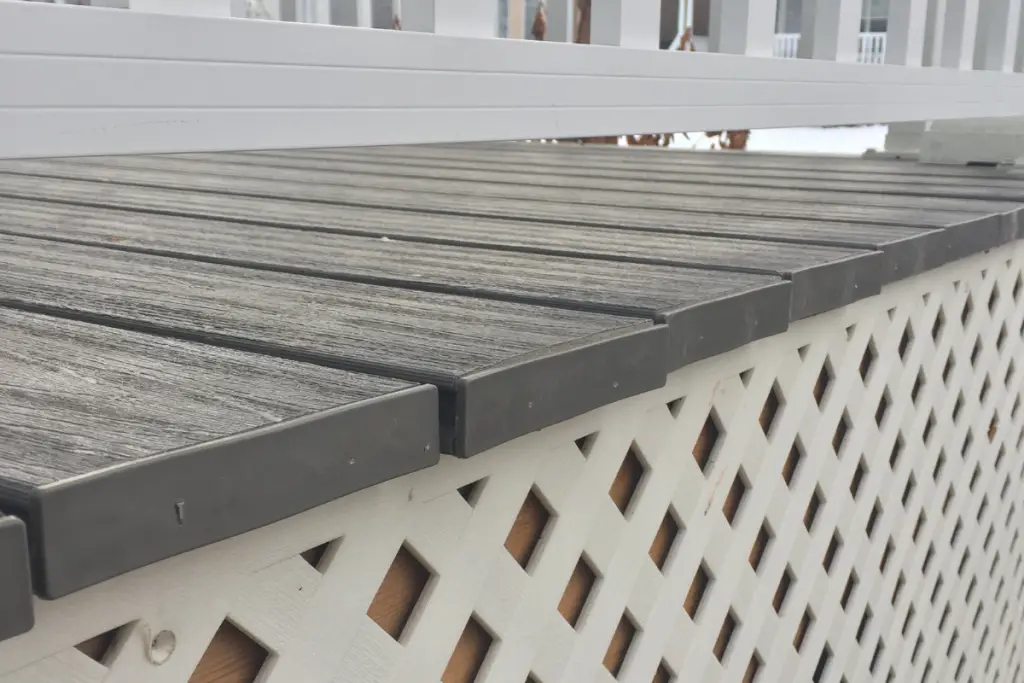
5. Screw end strip to ends
A combination of veneer and picture framing. Rip a composite deck board an inch or so thick and screw to the ends of the composite decking. Giving the decking boards end the nice clean finish of rounded decking edge.
Without all the extra substructure work involved with picture framing the deck or the challenge of attaching veneer to the end of each deck board.
6. Vinyl Stair nosing

An older solution to finishing composite decking ends taken from the interior of the house. The composite decking ends are finished off by attaching vinyl stair nosing to the ends. Finishing the edge of the deck with similar to vinyl stairs inside the house.
Requiring no extra framing, at a fraction of the cost of picture framing a composite deck.
7. Composite Corner Trim
A decking edge cover made of the same material as the decking. The look and feel of a stair nosing cap but in a composite.
8. Plastic Board Decking Ends
A finishing option only for decking boards with hollow cylinders in the decking board. The plastic end caps are attached to the end of the deck board with small taps that are tapped into the cylinders with a rubber mallet. Hiding the holes on the ends of the decking boards with a similar colour plastic.
Of these eight options for finishing composite deck ends, picture framing is my favourite. The decking finish I most often finish composite decking with. There are several reasons, appearance, maintenance and life of the deck of why I favour picture framing composite decking.
Let me better explain my criteria in evaluating the best way to finish composite decking ends.
Criteria for Evaluating Composite Decking Ends Finishes
The number one driving factor in finishing the ends of composite decking is appearance. However, you choose to complete the decking; it must look good. If it doesn’t improve the look of the ends. You may as well trim the decking and leave it at that.
Finish the ends needs to elevate the look of the decking and the deck.
The end finishing of the decking boards should not increase maintenance required for the deck. We choose composite decking for its low maintenance.
Finishing the deck boards with a finishing detail that requires regular and extensive maintenance destroys the low maintenance advantage of the composite deck. The level and type of care needed for the end detail must match the decking maintenance.
Decking finishing should complete the deck, not create problems. The finish of the deck boards ends should not develop complications for the life of the deck. In particular, trapping water and grime. The single biggest thing that will shorten the lifespan of a deck is trapped water.
End boards finishes should not trap water on the deck, decking or joists.
That being said, let’s evaluate possible decking finishes using these criteria.
Advantages and Disadvantages of Composite Decking Ends Finishes
PICTURE FRAME
Advantages
Picture framing is excellent in maintaining consistency with the appearance of the deck. With a consistent look on all the sides of the deck having the same look front and sides.
Along with the decking being consistent for the stairs, the treads mimicking the picture frame nosing and end look.
Using the same material, the decking for picture framing maintenance is consistent for the entire deck. The end finish and decking being cleaned in the exact same way.
The deck board resting on top of the end joist adds to the protection of the joist, shielding it from the rain, increasing the life of the deck.
On top of that. The gap between the decking and the picture frame draining water while not trapping gunk. Winning!
This gap also provides room for expansion and contraction of the decking, which is so critical with composite decking.
Not being attached like some other finishing options, there is no conflict between material and movement.
Disadvantages
The most significant disadvantage of picture frame finishing is cost. An additional joist with blocking will need to be added to the edges of the deck. On top of the extra deck board to run perpendicular to the decking to hide the ends.
Picture framing a simple 12′ by 12′ (3.6×3.6m) can add $500 to the cost of the deck once the extra material and labour are accounted for. Often increasing as square composite decking boards without the groove often are only sold in 20′ (6m) lengths, which increases the costs with large offcuts.
The mitre cuts are also problematic with picture framing. As the boards expand and contract during the day and seasons, the mitre joints will open and close. What once was a beautiful mitre joint joints becomes an ugly gap between boards.
RAISED FASCIA BOARD
Advantages
Probablythe easiest way to finish decking ends with no additional costs. Simple trim the decking and install the fascia flush to the top of the decking. All steps and materials that every composite deck requires.
Still being composite decking, it adds no additional maintenance.
Disadvantages
There are two distinct disadvantages of raising the fascia board. First is grime and water, the other the stairs.
With the decking cut flush with end joist and then capped with the fascia board. The potential for water to become trapped between the fascia board and the joist is great. Water is fine. Trapped water rots decks.
Joist membrane can minimize this risk, but it is still a disadvantage of the design.
The stairs are a different issue with inconsistency between treads and the deck. The treads nosing being decking but the deck edge fascia board .
.
Along with the inconsistency is wear. Decking is designed to be walked on. Fascia is not. Fascia material is thinner and does not have the structural strength to support regular foot traffic. Resulting in the edge of the fascia to wear down prematurely or break off.
PAINTED ENDS
Advantages
Again, a very cost-conscious finishing solution. TimberTech sells matching paint for their decking for under $20. Or you can buy a small “sample” paint from your local building supply store colour matched to the decking colour for as little as five bucks. Either way, the inconsistent colour of the end decking is removed.
The decking ends can still overhang the end joist helping to protect the joist by directing the rain off the deck and away from the joist.
Disadvantages
A traditional look of wood decking but doesn’t always work with composite decking. More and more composite decking is scalloped to reduce cost and weight. Creating ugly decking ends with voids that paint cannot hide.
Even when painted, cut ends look unfinished. The colour may help them blend in, but it’s still a cut end.
Glued on cap veneer
Advantages
Consistency of both the decking edge and ends in colour and texture is the most significant advantage here. Regardless of what angle you look at the deck, it all looks the same.
Disadvantages
Veneer cap is not readily available. Requiring a high level of skill and tools to create your own. The veneer can be cut from offcuts put the additional labour for each piece is high.
I have never done this but watching Dr. Decks do it for a fascia board makes me think it would add hours in construction to finish the decking. Costing more in time then picture framing the deck does in material and labour.
Also, it is only as strong as the connection. If the glue fails, so does the finish. And for this to work, you must use contact glue, which gives you only one shot to get it right.
Perfectly attaching veneer to 30 deck boards with zero errors. I hope you’re a brain surgeon because the same focus and accuracy will be required. And that’s for a small deck.
The thin veneer has no structural strength. You can glue it in front of the scallop holes, covering them over but one poke. It is game over.
Screw end strip to ends
The same edge deck looks as picture framing without the extra joist and block framing. More for the yard view, not on the deck looking down.
More durable then veneer but not as much as a complete deck board as in picture framing.
Advantages
The simplicity of construction is the most significant advantage of screws decking edge to the ends of decking boards.
Without all the extra framing to support the decking as picture framing, reducing the task in half. Additional material required is slashed to only a third of a deck board for each side of the deck. Bringing costs to only slightly over a $100 to finish the composite deck board ends.
Consistency is also maintained at the stairs with the matching nosing appearance at the deck leading to the stairs.
Disadvantages
Composite decking is not a structural material. That is why it requires so much blocking supporting it. Becoming even more apparent with smaller strips of decking.
The strength is only as good as they are fasteners to the ends of the decking.
Requiring either a high number of screws into the decking. Attaching the strips securely to the decking ends.
Or glue them similar as veneer but longer pieces along with screws holding in place.
This won’t matter on a deck with railing.
But at the stairs, it could potentially break off with high foot traffic. As the nosing is the most stepped on part, of a deck.
Vinyl Stair Nosing
They are a few different nosing materials available that can be used on composite decks. Three of the more common are vinyl, aluminum or plastic. Resting on top of the deck and then hanging over the edge covering the cut ends of the deck.
Advantages
Installation of vinyl stair nosing is easy. Roll it out. Trim to size. Fasten with pan head screws or glue down to the decking.
As stair nosing is not the same material or colour of the decking, it can create a border around the deck with colour contrast. Highlighting the edge of the deck. Which is good both aesthetically and for safety. As it minimizes accidental steps off the deck.
The added material on the edge of the decking and treads increases grip, minimizing slipping. A common complaint with some composite decking.
Disadvantages
The different materials may create contrast around the deck, but the change in material can be detrimental. Most composite decking has a life expectancy of 25 years or more. Not stair nosing, often wearing out sooner. Needing to be replaced long before the decking. Increasing maintenance. Not annually but before the decking.
That traction grip around the edge of the deck is also a dam. The small lip trapping water and dirt on the decking. For composite, it won’t increase rot, but it does make it harder to clean the deck as not all the water and dirt will run off the deck.
Composite Corner Trims
Similar to vinyl stair nosing except the same material as the decking, composite. However, limited availability as few manufactures offer composite corners.
Advantages
One of the most significant advantages of composite corners is it is composite. The same as the decking. Requiring the same maintenance with all the same benefits of composite. Good decking, good trim.
The cost is also very reasonable. Composite trim is less than $40 for a 12’x12′ deck. Costing less than one piece of decking and not requiring all the extra framing details to support it.
Disadvantages
But just like stair nosing, the small lip around the perimeter of the deck will trap water and dirt. Making cleaning the deck harder.
Plastic Decking Boards End Caps
Only available for hollow cylinder composite decking. With small plugs that are tapped into the holes holding the cap into place. Finishing of the decking but covering those unsightly holes on the ends.
Advantages
Does not require additional framing, while still allowing the decking to overhang the framing. Providing a clean look to the deck while leading the water off the substructure.
All while keeping installation simple.
Again, at a reasonable price. Around $60 for a 12’x12′ deck. Hard to compete with that price.
Disadvantages
This is not a one size fits all solution for decking ends. Only available for composite with cylinder cavities to receive the plugs.
The single largest drawback is it does not live up to the promise. There are many complaints that even though it sounds simple to install. Line up to the holes and tap in. It’s not! Frustrating precision is required to tap the ends in equally. Not overdriving one side, binding the plugs.
Then once you get them installed, they break way easier than they should. Requiring the damaged ends to be pulled out and replaced. Often in only a few years’ time. Way too soon for a composite deck.
Conclusion of Finishing Composite Decking Ends
However, you decided to finish your composite board ends. Choose a way that will not increase the maintenance of the deck. That will genuinely hide the unsightly ends.
This includes not complicating cleaning the deck by creating water dams. That traps water and dirt on your deck.
If your deck has stairs, finish in a way that is consistent with the stair nosing.
I think most often, picture framing checks all these boxes. Followed by raised fascia if the budget is tight. Two of the best options for finishing composite decking ends.
If you haven’t yet decided on which composite decking to buy. You should check out my list of the best composite decking brands. Composite decking is great but it is not all created equal. Some brands excel better in certain applications, others have better warranties and others just look better. But you should just click the link to find out.