Building your own composite deck can be a fun project for DIYers, but there’s one part that can intimidate even the most seasoned of DIY builders – the stairs.
Stairs or steps are necessary for you to be able to get up and down from your deck to the ground or patio below, but there’s a lot of factors to consider when building your stairs.
Each municipality has its own riser height and run (tread depth) that you must abide by, a lot of DIY builders forget to include the decking in its height, and so much more.
While I could write pages and pages talking about how to build and layout stairs for your deck, but this is a short and easy guide for you to follow. I will try to make each step as clear as possible but still keep them precise so as not to waste your time.
Stringer Spacing for Composite Decking
This is what sets building composite deck stairs apart from any other decking. Composite strength varies by brand. Meaning you need to install the stringers spaced according to the brand of composite decking being installed.
After reviewing over 50 brands of composite decking , I am going to say always check the latest installation instruction before starting to build your deck stairs.
But here is a handy cheat for some of the top brands of composite decking.
| Composite Brand | Max Stringer Spacing |
| Deckorators (WBC) | 9” |
| Deckorators (MBC) | 9” |
| Duxxbak | 12” |
| Fiberon (WBC) | 12” |
| MoistureShield (Vision, Meridian, Vantage) | 9” |
| MoistureShield (Elevate) | 8” |
| TimberTech Azek | 10” |
| Trex Transcend | 12” |
| Trex Select & Enhance | 9” |
| Wolf Serenity | 11” |
| Zuri | 12” |
As you can see, with some brands, you can space as far as 12″ apart.
But if you can’t find your exact brand stringer spacing, the safe answer is 9″ with a closed-dimensional riser.
Along with many brands require a minimum of 5 stringers for stairs 36″ wide or less. And seriously, why are you building stairs any skinner?
In summary, you will need a minimum of 5 stringers for your composite deck stairs. But the wider your stairs get, the more stringers you will need. Measure and do the math.
Step One: Determine The Rise And Run Of Your Stairway
First, you will want to work out the rise and run of your stairs for the stringer (the board that supports the stair underneath). .
Most DIY builders like to visualize this by installing a piece of decking or setting it on top of the frame, then clamping a long 2×4 across the deck frame on top of this, so it hangs out over the edge of the deck. What this does is shows you the maximum height of your finished deck so you know how tall your stairs need to be.
Then, using a story pole, measure and mark every 7 and ¾ inches along the pole. This is the tallest rise for a stairway for most places in the US but check your municipality – you don’t want to create a stairway that is too steep.
Hold your story pole against the deck with one end touching the ground. Then, count the spaces on the pole to see how many steps will be needed for your deck’s stairs. This will tell how many risers your deck stairs will need.
But now you need to figure out the exact riser height.
Measure the height of your deck. From the ground to the underside of the extended 2×4. If your yard is sloped, do this roughly where your stairs will land. Which should be approximately the number of risers minus 1 times 10. I will get to why later.
Now that you know the exact total stair rise, you need to divide that number again by the number of risers.
For example. if your deck is 40″ high. With your story pole you know you need 6 risers.
40″ ÷ 6 = 6 21/32″ rise
21/32″ is next to impossible to find on a framing square, so a little rounding to 5/8″ over 6 risers is fine.
Next, you need to determine the run. There will be one less run for your stairs as this is your deck. For example, our 40″ high deck, with 6 risers, will have 5 runs/treads.
Take two boards of your composite decking and place them side by side with the appropriate space in between for your decking. Measure that length, and that will give you your tread run.
Often stairs will have a nosing. Allowing you to reduce the run length by a maximum of 1″. Which is good because most composite decking is not designed to overhang the framing more than 1″. Check your particular brand requirements. It does vary. TimberTech’s solid boards can overhang a full 1″, but Trex only 3/4″.
For some of the more popular composite brands’ nosing and maximum overhang, click the link.
But for now, let’s just assume a nosing overhang of 1″.
Then 2 composite decking boards at 5 1/2 each plus the standard 3/16″ gap, gets us to 11 3/16″ tread sizes. With a 1″ nosing, our run should be 10 3/16″. 10 1/4″ is even better.
Now you know the run for each of your steps, you can measure out where your composite stairs will end.
Measure this across your piece of 2×4 away from your frame, mark it, and place your story pole there to check the height. You will need a hard surface at the bottom of your stairs.
If you already have one there, then great! If not, you may need to create a concrete (or brick or paver) surface at the bottom of your stairs. Something that can support the stairs and not rot in the ground.
Now with all the math done, time for drawing and cutting of the stair stringers.
Step Two: Cut Your Stair Stringers
You now have the measurements for your run and your rise – it’s time to mark out your stair stringers and cut them out.
Using a framing square and clamps, you can set the rise on one side of the square and the run on the other. Use this to draw the run and rise on a piece of 2×12 lumber to create your stairway stringer. Do this repeatedly until you have the correct number of rises for your stairs.
Once that’s done, its time to cut them.
Cut till where the lines intersect with a circular saw. Then switch to either a jig or hand saw to finish the cut. Overcutting with a circular saw will weaken the stringers and increase rot by trapping water inside the wood.
One final step before the stringers are done.
Measure the thickness of the decking (Commonly 1″ with composite decking). Cut this amount off the bottom rise of stringers.
This will make the height of all the steps the same. As with all the other steps, you are stepping from decking to decking. But with the bottom step, the ground, there is no decking thickness.
That’s your first stringer done. You will need more than one, but this depends on how wide your stairs will be.
Check that everything works out, and then trace this one out to cut all the other stringers.
The number will vary according to how you reinforce the composite decking. We will get to that soon.
Step Three: Installing Your Stairs
Finally, time to start installing parts of your stairs for your composite decking.
You first need to install your header by attaching two pieces of wood to the frame extending down to screw your header against. Providing your stairs with a strong connection.
At each end of your header, measure one rise below the surface of your decking, mark it, and then clamp your outer stringers. This will show you how deep your stairs will be and show you where you can add your bottom newel posts.
Take pieces of 4×4 lumber, place them flush with the edge of the outer stringers and near the ground. Clamp them in place, and mark the ground where you need to dig your holes for your bottom new posts.
Then, install a support block against the front of the rim joist. This will act as a stopper when installing your outer stringers. Cut it to length (same as your header) and install it in place. You can also use this to lay out your stringers.
Once your support block is installed, you can place your outer stringers flush to the support block and install them in place.
You can then add your front rim board (matching the header) and the bottom newel posts, dropping them into the holes you have already dug and ensure they are straight and flush against the stringer.
Using Alumnium top mounted post are eaiser and require less work. A solid block underneath the decking where the post wil go and your done.
Builder Tip
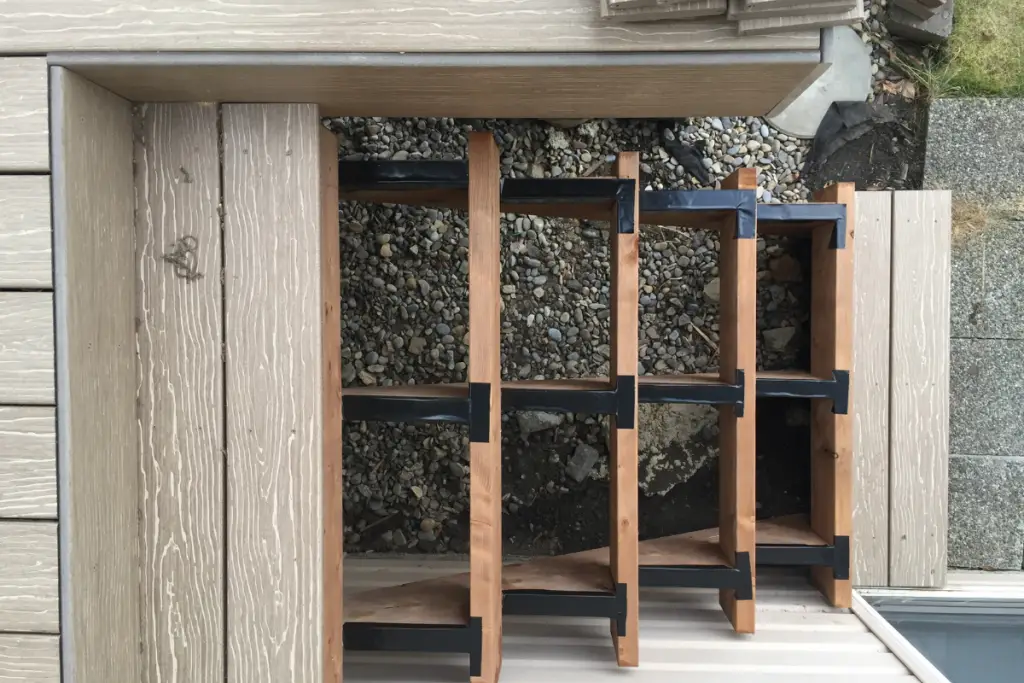
Now, climb under the deck and install strap ties to connect your stringers to the header. The brackets provide additional support and stability for your stairs.
Step Four: Install Your Treads, Risers, And Fascia
By now, the skeleton of your stairs should all be done. Your stringers are in place. Your posts are in place. The extra support is all connected together. All that’s left to do now is start installing your composite decking – your treads, risers, and fascia.
Before installing the rest of the stringers, you need to decide how you are going to reinforce the composite decking.
Check with your composite decking installation guide of which one is appropriate, but there are 3 common ways.
- Increase the number of stringers. Often 9″ on centre.
- Install solid wood fascia, riser board supporting the front stair board
- Install flat blocks underneath the decking between the stringers.
Once you have installed the necessary stringers and reinforced the steps for composite decking, you are ready to install the decking.
Start from the bottom step and work your way up. place Checking that you have the correct nosing depth as you work your way up. Then attach the decking by screwing them down to the stringers.
Then, it’s time to add your composite fascia. It’s best to use a stringer as a template to trace them out cut. Then install them on either side of your stairs.
Final Thoughts
Making your own stairs for your composite decking is not an easy task – but that shouldn’t stop you from giving it a try!
Take the time to get the correct measurements, do the math, cut out your stringers, install the correct support blocks, and assemble it all together through the installation. Once your stringers and framing is done, installing the decking treads, risers, and fascia is a piece of cake.
While this is a very simple and quick overview on how to build your own composite decking stairs, there are plenty more resources available for additional advice and support. Good luck!